
-
-
Öffnen Sie die System-GUI Silent Brick über einen Webbrowser
-
Wählen Sie 'Bibliotheken'
-
Klicken Sie auf 'Add'
-
Geben Sie einen Namen ein
-
Wählen Sie den gewünschten Bibliothekstyp (Details zur Anleitung finden Sie im ersten Kapitel)
-
-
-
Bearbeiten "Laufwerksname Präfix ', wenn nötig.
-
Wählen Sie eine Anzahl von Laufwerken.
-
Wählen Sie den gewünschten Laufwerkstyp. (Einzelheiten zur Anleitung finden Sie im ersten Kapitel.)
-
-
-
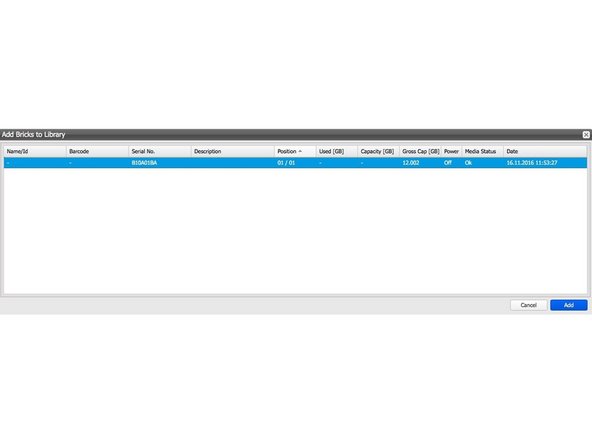
Wählen Sie die gewünschte Anzahl von Bricks aus der Liste aus.
-
Verwenden Sie 'STRG', um mehrere Bricks auszuwählen.
-
Bestätigen Sie, indem Sie auf "Hinzufügen"
-
-
-
Beste Verwendung mit 10GB Ethernet
-
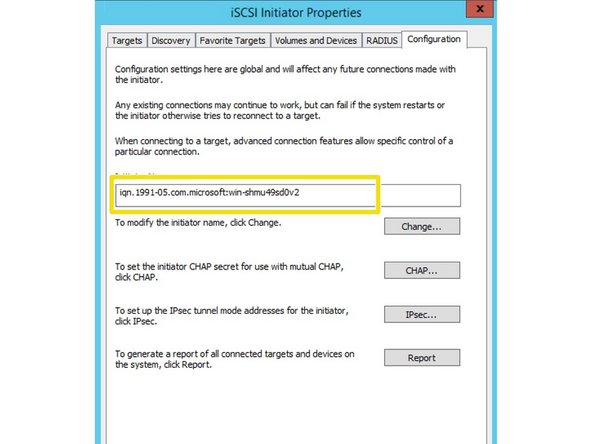
Holen Sie sich Ihren iSCSI-Initiator-Namen aus dem Windows
-
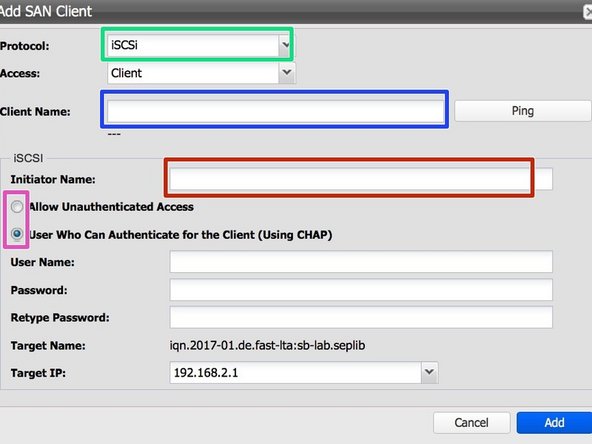
Richten Sie einen iSCSI-Client über die Weboberfläche Silent Brick ein, indem Sie das Protokoll iSCSI auswählen.
-
Client-Name: Geben Sie die IP-Adresse oder den Namen des Host-Client-Fenster
-
Initiator Name: Geben Sie den Initiator Zeichenfolge, die Sie in Schritt 1 abgerufen
-
Authentifizierung: Bei Bedarf, Authentifizierung eingerichtet werden kann. Empfehlung ist keine Authentifizierung
-
-
-
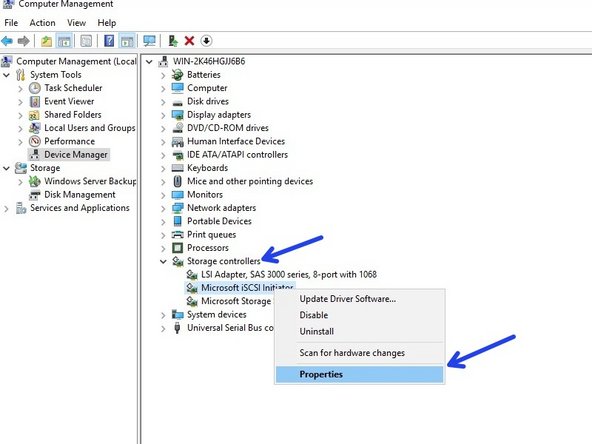
Öffnen Sie Ihren Windows-Computer-Manager und erweitern Sie „Speichercontroller“
-
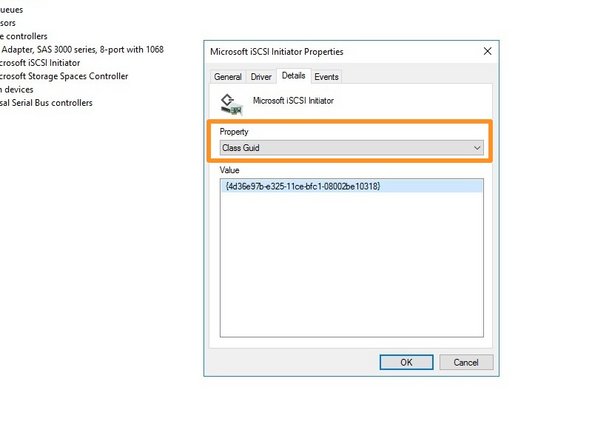
Wählen Sie Ihren iSCSI-Initiator und wählen Sie Eigenschaften
-
Wechseln Sie zu Details und wählen Sie die Eigenschaft "Class Guid"
-
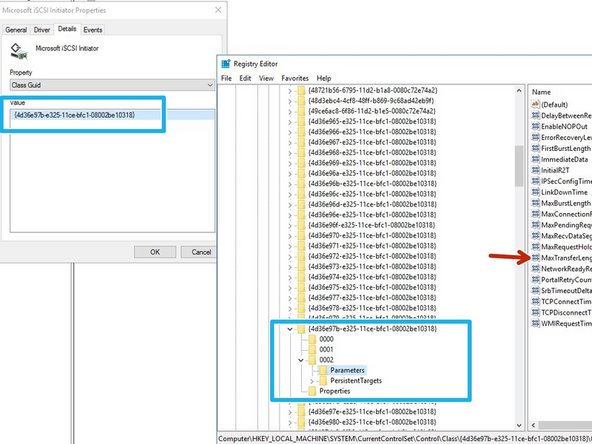
Öffnen Sie regedit und navigieren Sie zu HKEY_LOCAL_MACHINE - System - CurrentControlSet - Steuerung - Klasse -<iSCSI Class ID> -<ID> - Parameter
-
Passen Sie in Parameters die ' MaxTransferLength' an. Dieser Wert muss Ihrer Bandblockgröße entsprechen (wird später konfiguriert). 1 MB=0x100000, 512KB=0x80000, 256KB=0x40000. Empfohlenes Minimum 256 K
-
-
-
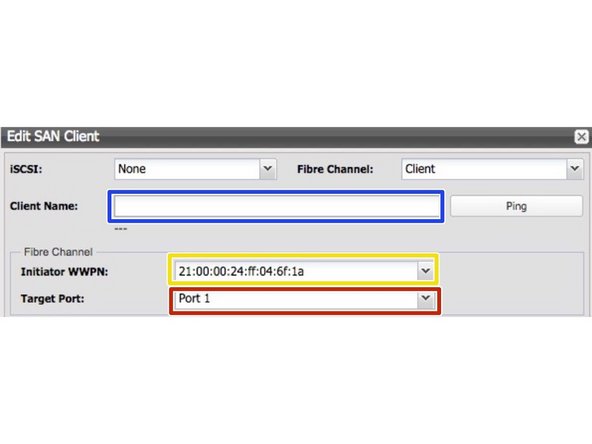
Nur für Controller mit Fibre-Channel unterstützt
-
Client-Name: Geben Sie die IP-Adresse oder den Namen des Host-Client-Fenster.
-
Zielhafen: Hafen wählen zu verbinden.
-
Port Aufzählung ist von rechts nach links.
-
Bei der Einstellung "Jeder" wird der linke Port 2 verwendet.
-
Initiator WWN: WWN Partner mit zu verbinden wählen.
-


Rückgängig: Ich habe diese Anleitung nicht absolviert.
3 weitere Nutzer haben diese Anleitung absolviert.

Team
