
-
-
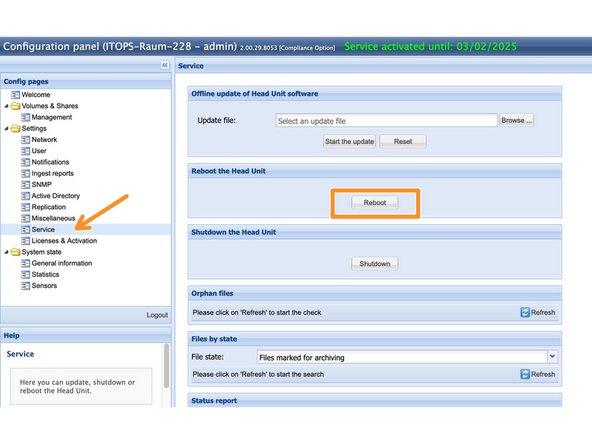
Während der Aktualisierung ist das System nicht verfügbar. -
Die Benutzeroberfläche von Head Units ist über einen Webbrowser unter folgender Adresse erreichbar: https://<System IP>
-
Prüfen Sie, welche Softwareversion derzeit auf dem System installiert ist.
-
Systeme mit Software ab 2.00 können nicht auf die Version 3.00 aktualisiert werden. Ab der Softwareversion 2.00.29.7750 ist ein direktes Update auf alle aktuellen 2.00er Softwareversionen möglich. -
Für alle älteren Softwareversionen ab 2.00.29.7750 sind Zwischenschritte erforderlich. Wenden Sie sich in diesem Fall bitte an den FAST Support.
-
Prüfen Sie, ob das System noch Service enthält. Falls das System kein Service mehr enthält, kann es nicht aktualisiert werden!
-
Laden Sie die benötigte Softwareversion vom FAST Update Server herunter. http://swupdate.fast-lta.net Benutzer: evb Passwort: getUpdate
-
Die .tar-Datei darf nicht entpackt oder umbenannt werden. Die Datei wird automatisch vom System entpackt und überprüft.
-
-
-
Wenn Sie sich nicht sicher sind, ob Sie ein repliziertes oder ein einzelnes System haben, können Sie dies unter Replikation überprüfen.
-
Wenn die Felder für die virtuelle IP-Adresse und die Secondary Head Unit IP-Adresse ausgefüllt und ausgegraut sind, handelt es sich um ein repliziertes System.
-
Wenn die Felder leer sind, dann haben Sie ein einzelnes System.
-
Das Primary-System ist im Header durch den Eintrag „Primary“ oder, in älteren Softwareversionen, durch „Master“ zu erkennen.
-
Darüber hinaus verfügen die Primary-Systeme über eine sehr detaillierte Menüleiste.
-
Bei Secondary-Systemen steht im Header „Secondary“ oder, bei älteren Systemen, „Slave“.
-
Darüber hinaus ist die Menüleiste deutlich kürzer.
-
Bei Einzelsystemen gibt es keinen Eintrag im Header.
-
-
-
Stoppen Sie die Datenspeicherung im System vor dem Update
-
Ein Downgrade des Systems auf eine ältere Version ist nicht möglich.
-
Vor dem Update sollten die ausstehenden Dateien auf 0 stehen. Diese Dateien befinden sich nur im Cache des Masters Head Unit. Das Update kann auch mit noch ausstehenden Dateien durchgeführt werden, allerdings besteht das Risiko, dass diese Dateien bei Problemen während des Updates verloren gehen.
-
Überprüfen Sie, ob auf der Festplatte des Head Unit genügend Speicherplatz für das Update vorhanden ist. Melden Sie sich am System an. Geben Sie /spt Am Ende der Browserzeile eingeben, um zur Supportseite zu gelangen.
-
Testen Sie den Speicher unter Disk Usage /var/fast/sc.
-
Der belegte Speicherplatz wird hier angezeigt. Es müssen mindestens 50 % freier Speicherplatz verfügbar sein
-
-
-
Bei replizierten Systemen muss folgendes angehakt werden. Falls die Checkbox Automatisches Failover gesetzt ist, entfernen Sie diese bitte und speichern Sie dies mit -> Speichern.
-
Starten Sie die Geräte Primary und Secondary Head Unit vor dem Update neu.
-
In einem replizierten System mit Primary und Secondary Head Unit muss zuerst das System Secondary aktualisiert werden. Sobald das System Secondary bereit ist, kann mit dem System Primary begonnen werden.
-
-
-
Bei einem Einzelsystem können Sie direkt mit Ihrem Head Unit beginnen. In einem replizierten System beginnen Sie jetzt mit dem sekundären Head Unit.
-
Gehen Sie über https://<System IP> zur GUI des jeweiligen Systems.
-
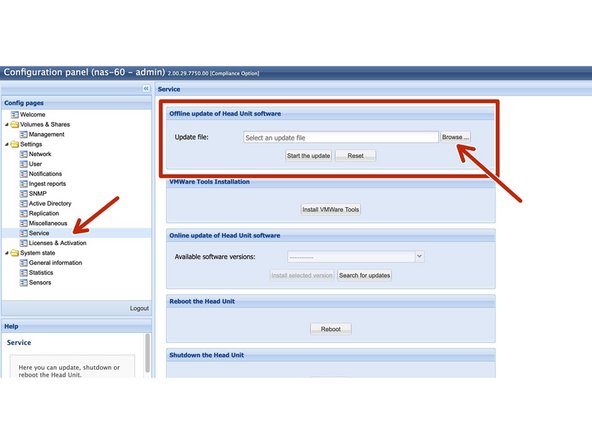
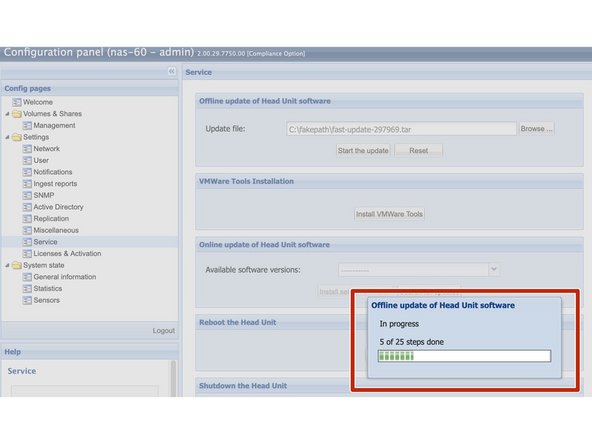
Gehen Sie nun zu Service -> Offline-Update der Software Head Unit. Klicken Sie auf „Durchsuchen“ und wählen Sie die entsprechende Update-Datei aus.
-
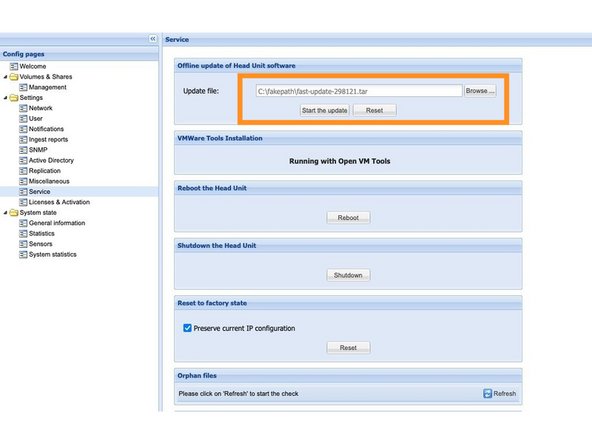
Wenn Sie die richtige Datei ausgewählt haben, klicken Sie auf -> Update starten.
-
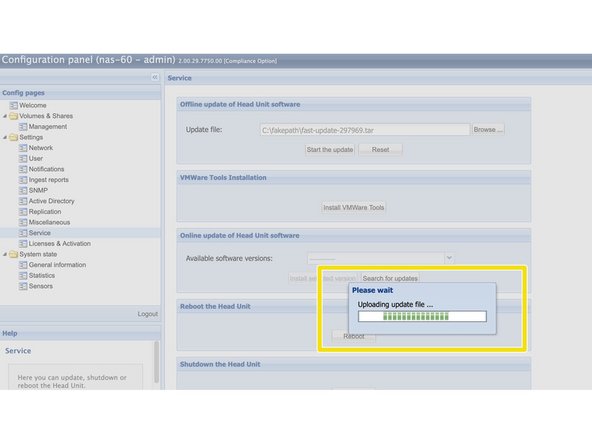
Die Update-Datei wird nun auf Head Unit hochgeladen. Dies kann einige Minuten dauern.
-
-
-
Abhängig von der Softwareversion, der verwendeten Hardware und der Anzahl der gespeicherten Dateien dauert das Update normalerweise etwa 30 - 60 Minuten pro Head Unit.
-
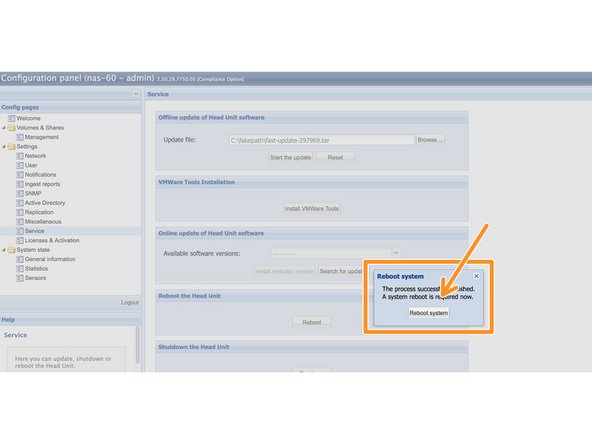
Während des Updates darf das System nicht neu gestartet oder von der Stromversorgung getrennt werden. -
Wenn das Update abgeschlossen ist, werden Sie aufgefordert, den Computer neu zu starten. Bitte klicken Sie hier -> Systemneustart
-
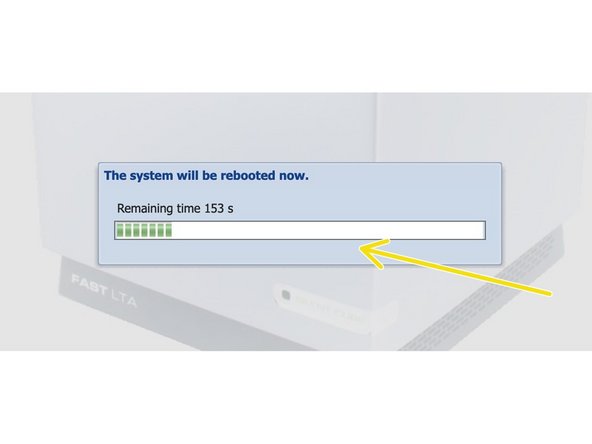
Warten Sie, bis das System neu gestartet wurde.
-
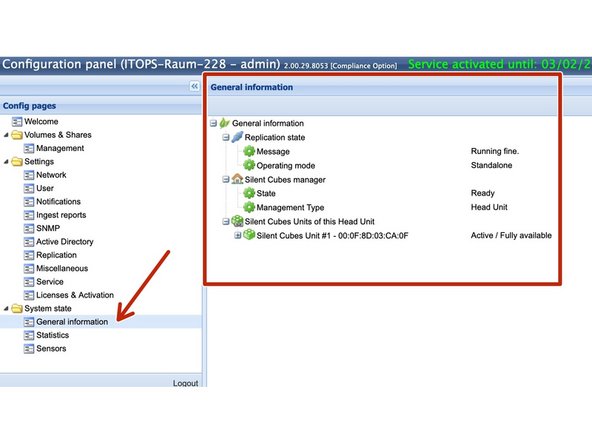
Wenn Sie ein einzelnes System haben, ist das Update jetzt abgeschlossen. Überprüfen Sie das System unter Allgemeine Informationen. Hier sollte jetzt wieder alles grün sein.
-
Wenn Sie ein Einzelsystem haben, das sich im Active Directory befand, fahren Sie mit Schritt 7 fort
-
-
-
Wenn die Aktualisierung von Secondary Head Unit abgeschlossen ist, beginnen Sie mit Primary Head Unit.
-
Führen Sie die Schritte von Schritt 4 und Schritt 5 nun auch für die Master-Maschine aus
-
Warten Sie nach Abschluss der Aktualisierung einige Minuten, bis das System neu gestartet und erneut synchronisiert wurde.
-
Überprüfen Sie das System unter Allgemeine Informationen. Hier sollte jetzt wieder alles grün sein.
-
Die Aktualisierung beider Head Units ist nun abgeschlossen.
-
-
-
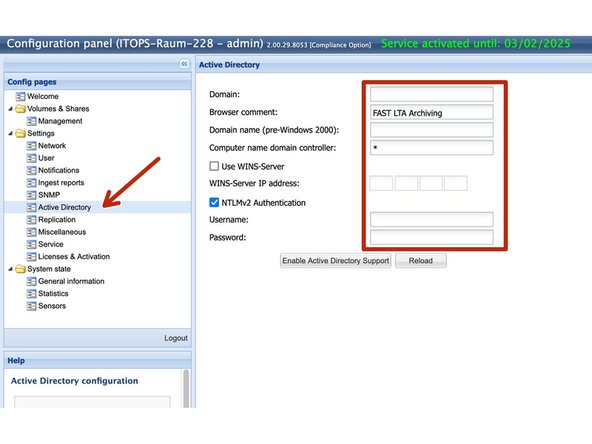
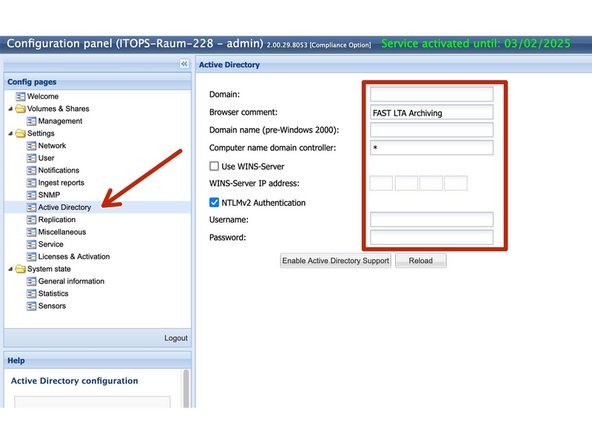
Überprüfen Sie, ob sich das System im Active Directory befindet. Gehen Sie zu Active Directory. Wenn hier alle Felder leer sind, dann war das System nicht in AD und Sie können hier enden.
-
Wenn die Felder ausgefüllt und ausgegraut sind, befand sich das System im Active Directory. Da wir die Samba-Software des Systems in neueren Software-Versionen aktualisiert haben, kann hier eine erneute Anmeldung erforderlich sein.
-
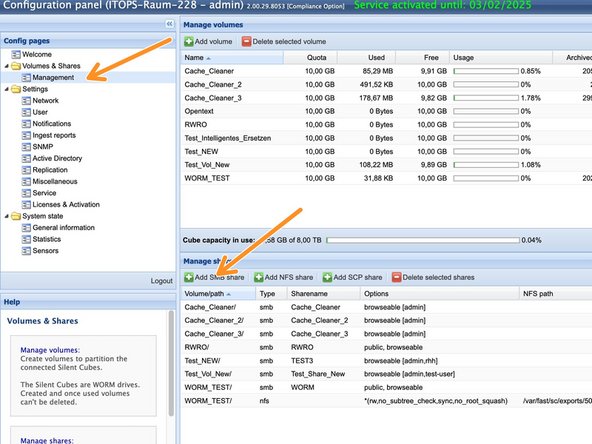
Überprüfen Sie nun, ob das System noch Zugriff auf Active Directory hat. Gehen Sie zu Verwaltung und klicken Sie auf SMB-Freigabe hinzufügen.
-
-
-
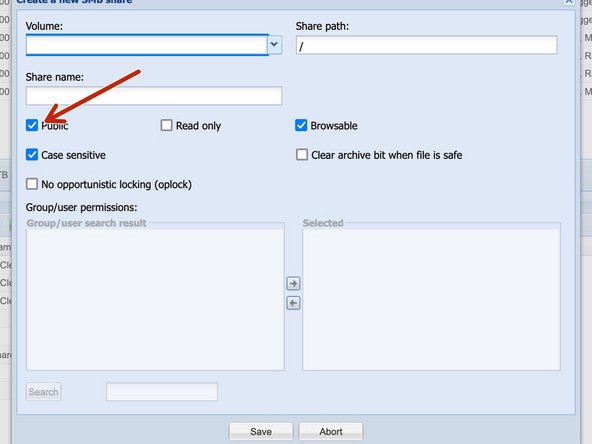
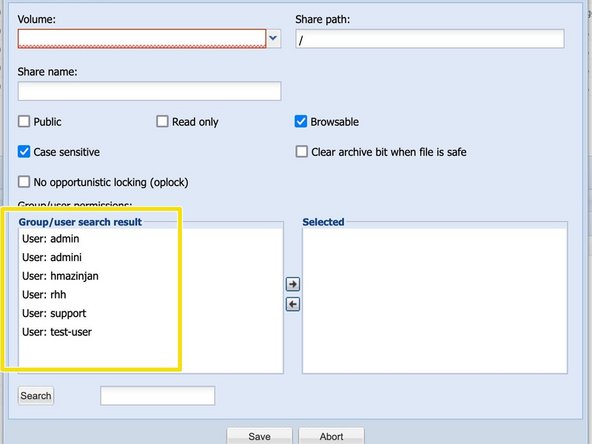
Das SMB-Fenster wird angezeigt. Deaktivieren Sie das Kontrollkästchen Öffentlich
-
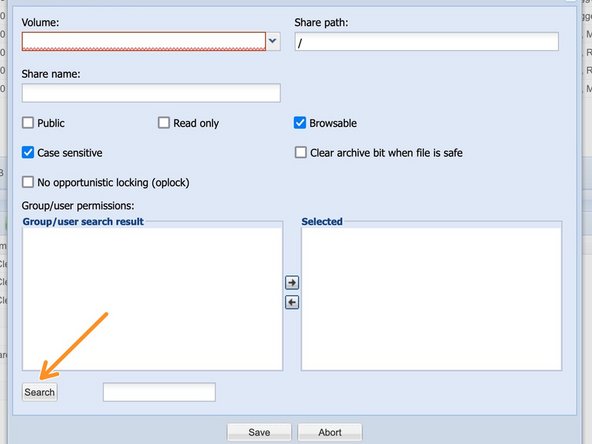
Klicken Sie nun auf Suchen, um eine Benutzersuche zu starten.
-
Alle AD-Gruppen und alle lokalen Benutzer werden aufgelistet. Die AD-Gruppen haben das Präfix AD-Group. Wenn Sie keine AD-Gruppen sehen, obwohl sich die Maschine im AD befinden sollte, müssen Sie die Maschine zum AD hinzufügen.
-
-
-
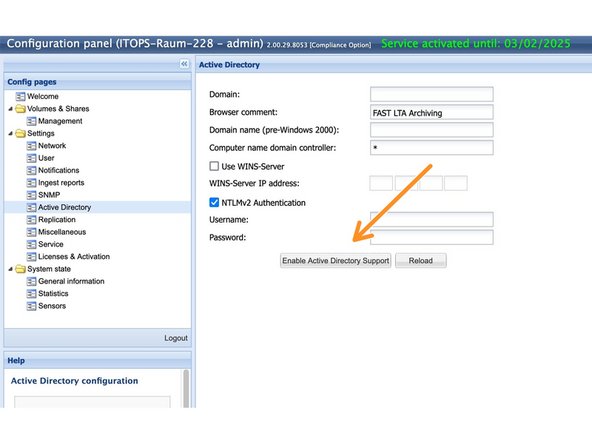
Bringen Sie das System zurück zu Active Directory.
-
Hierzu ist es erforderlich, dass der Mitarbeiter beim Kunden über admin-Rechte im Active Directory verfügt und Maschinenkonten anlegen kann.
-
Überprüfen Sie die alten Einstellungen in den Active Directory-Feldern und ändern Sie diese gegebenenfalls.
-
Wenn alle Felder korrekt ausgefüllt sind, klicken Sie auf Active Directory-Unterstützung aktivieren, um die Maschinen wieder zum Active Directory hinzuzufügen. Bei einem replizierten System werden hier beide Maschinen automatisch eingeschlossen.
-
Wenn die Maschinen nicht zu AD hinzugefügt werden können, hilft es oft, die alten Maschinenkonten manuell zu entfernen und neue zu erstellen.
-


Rückgängig: Ich habe diese Anleitung nicht absolviert.
3 weitere Nutzer haben diese Anleitung absolviert.
Team
