Einleitung
Diese Anleitung dient der Anbindung der Backup- und Archivierungssoftware Archiware P5.
Diese Anleitung wurde mit Archiware P5 Version 5.5.5 und dem Silent Brick WORM-Archiv Version 2.11 getestet.
-
-
Installation und Anschlüsse Die Installation und der elektrische Anschluss sowie die Netzwerkverbindung erfolgen wie im Handbuch Installation beschrieben. -
Netzwerkanpassungen Die Netzwerkeinstellungen sind wie im Handbuch Installation beschrieben vorzunehmen. -
Archiware unterstützt zwei verschiedene Möglichkeiten zur Verbindung mit dem Silent Brick-System. Beide der folgenden Verbindungsmethoden werden in diesem Handbuch behandelt.
-
Anschluss an ein SNAS Volume
-
Verbindung zu einer virtuellen Bandbibliothek
-
-
-
Verbinden Sie sich mit der Silent Brick Webschnittstelle
-
Wechseln Sie zu Einstellungen -> SMB
-
Erstellen Sie einen Benutzer „archiware_user“ mit einem entsprechenden Passwort
-
-
-
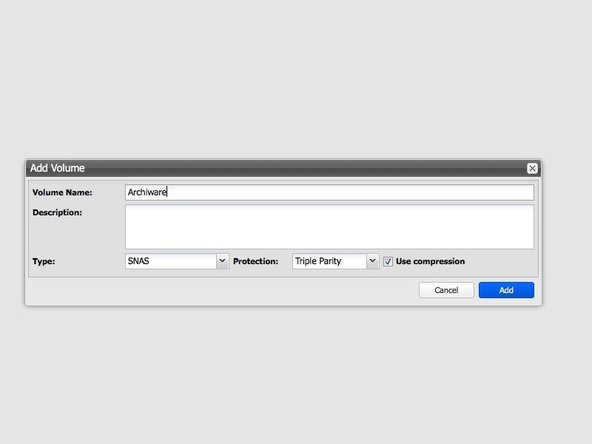
Erzeugen Sie eine neue Volume vom Typ 'SNAS' mit einer Parität von 3 oder 2
-
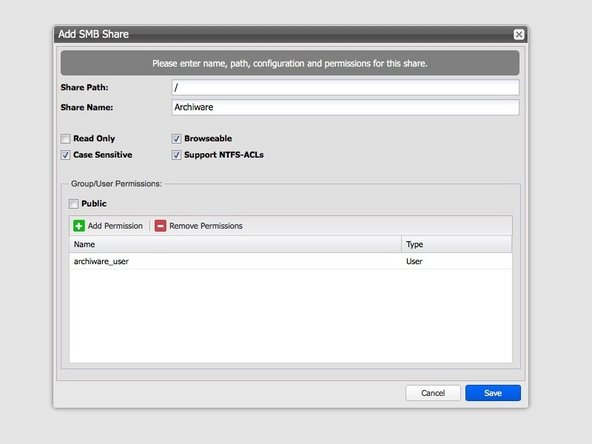
Erstellen Sie eine neue Freigabe mit Standardeinstellungen und wählen Sie den zuvor eingerichteten Benutzer „archiware_user“ aus
-
-
-
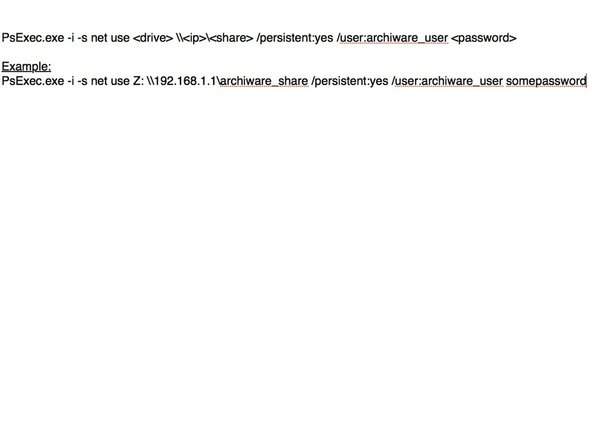
Um eine NAS-Freigabe mit Archiware zu verbinden wird das Tool PsExec.exe von Microsoft benötigt
-
Mounten Sie die zuvor erstellte Freigabe über PsExec.exe
-
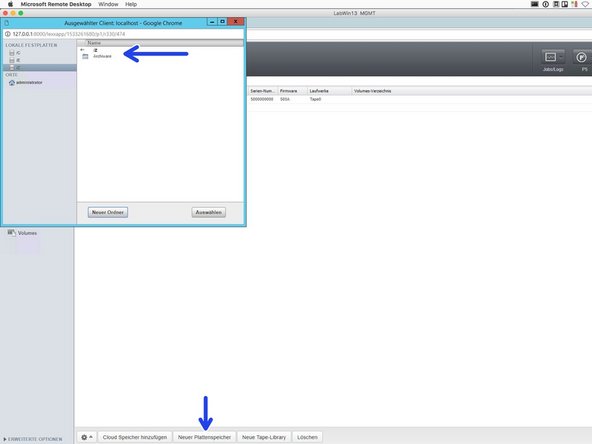
Erstellen Sie in Archiware einen neuen Diskstorage und wählen Sie den Pfad, in dem Ihre Freigabe gemountet ist.
-
Überspringen Sie die Beschriftung, wenn Sie dazu aufgefordert werden.
-
-
-
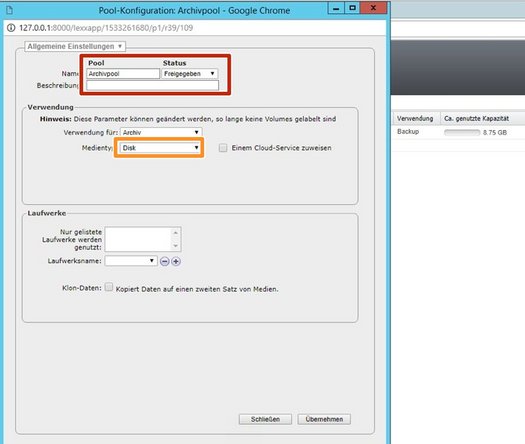
Bei Bedarf einen neuen Medienpool erstellen
-
Wählen Sie den Medientyp „Disk“
-
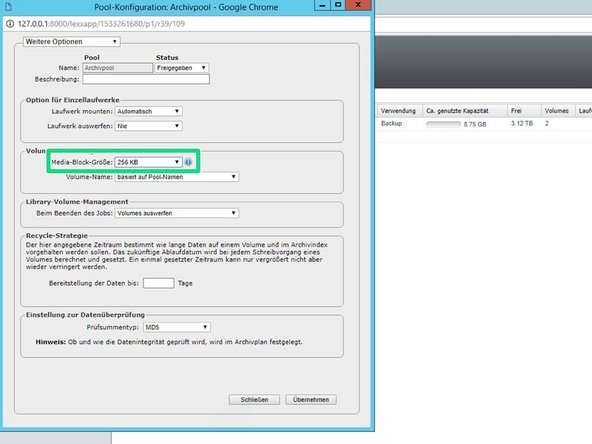
Passen Sie unter „Erweiterte Einstellungen“ die Blockgröße auf 256 KB an.
-
-
-
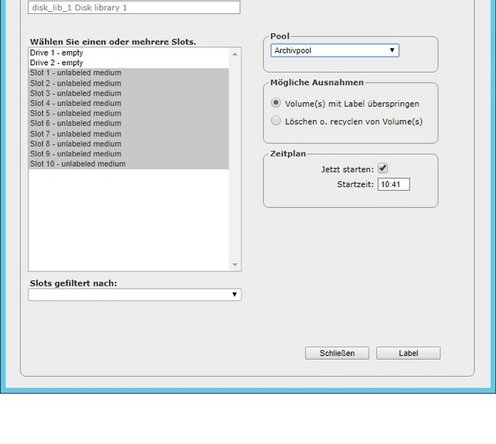
Wählen Sie Ihren neuen Pool und wählen Sie „Label“
-
Wählen Sie alle logischen Bänder aus und starten Sie den Beschriftungsprozess
-
Ihr SNAS Volume ist jetzt verbunden und die logischen Bänder können innerhalb von Archiware verwendet werden.
-
-
-
Wählen Sie im Silent Brick System „Bibliotheken“ und fügen Sie eine neue hinzu
-
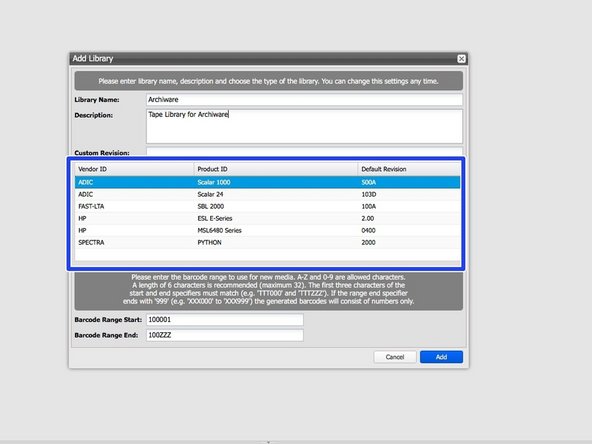
Stellen Sie den Bibliothekstyp auf „Adic Scalar 1000“ ein.
-
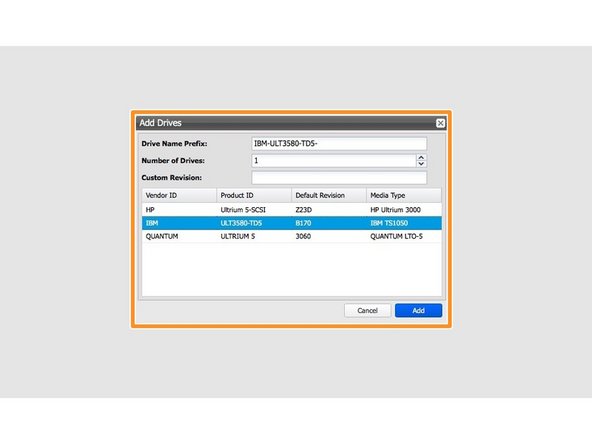
Laufwerke vom Typ IBM hinzufügen
-
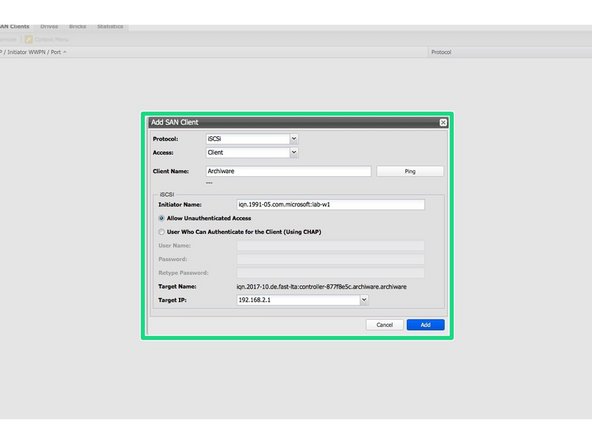
Einrichten einer iSCSI- oder FibreChannel-Verbindung
-
-
-
Wechseln Sie zum Windows-Host Ihrer Archiware P5-Installation
-
Verwenden Sie den iSCSI-Initiator oder Ihre Fibrechannel-Verbindung, um die virtuelle Bandbibliothek mit Ihrem Host zu verbinden.
-
-
-
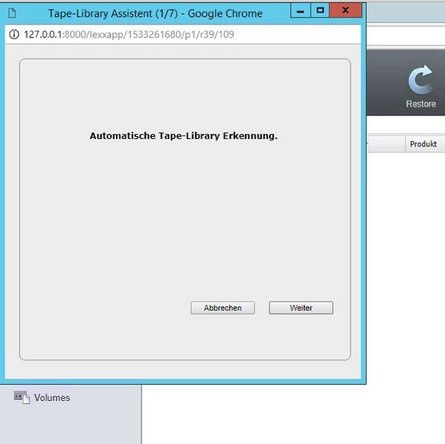
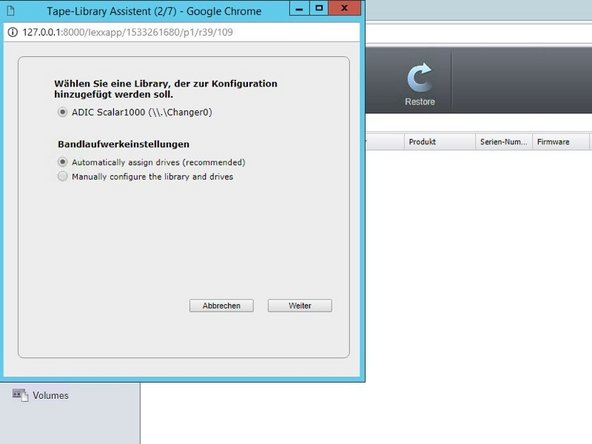
Starten Sie die automatische Banderkennung in Archiware P5.
-
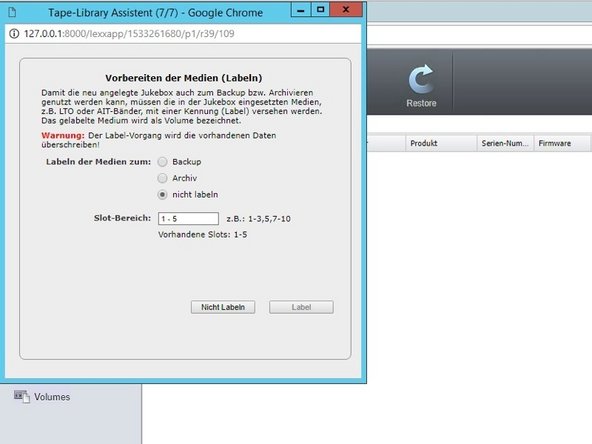
Entscheiden Sie sich, die Bänder noch nicht zu beschriften.
-
-
-
Einen neuen Medienpool erstellen.
-
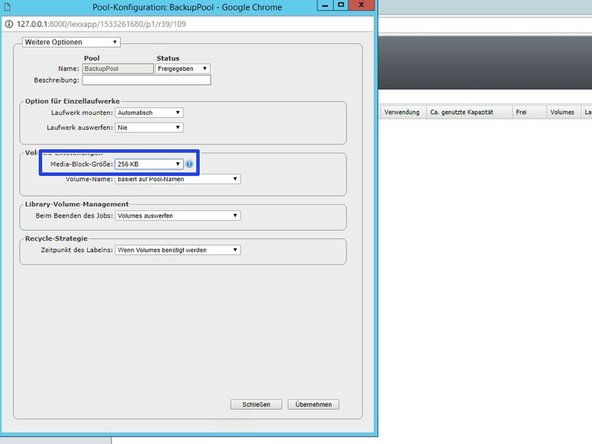
Stellen Sie die Blockgröße unter den erweiterten Einstellungen auf 256 KB ein.
-
-
-
Wählen Sie Ihren neu erstellten Medienpool
-
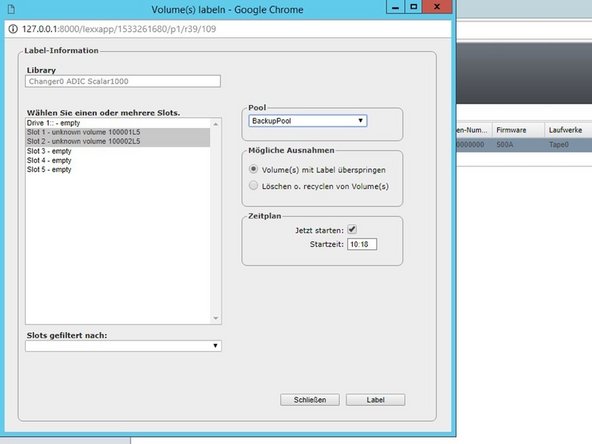
Wählen Sie „Label“, um mit der Beschriftung der Bänder zu beginnen
-
Wählen Sie die freien Bänder aus und wählen Sie das Etikett.
-
Ihre Bibliothek ist jetzt vollständig nutzbar.
-


