Einleitung
Dieses Handbuch zeigt die Anleitung zum Verbinden des Silent Brick Systems mit Veeam für Office 365
Diese Anleitung wurde mit der Silent Brick Systemversion 2.33 getestet
-
-
Installation und Anschlüsse Die Installation und der elektrische Anschluss sowie die Netzwerkverbindung erfolgen wie im Handbuch Installation beschrieben. -
Netzwerkanpassungen Die Netzwerkeinstellungen sind wie im Handbuch Installation beschrieben vorzunehmen.
-
-
-
Die Einstellungen dieser Volume unterscheiden sich von den Einstellungen für ein Backup-to-Disk-Repository, das Large File Optimization und wahrscheinlich kein Audit verwendet.
-
Erzeugen Sie eine neue Volume vom Typ 'SNAS' mit einer Parität von 3 oder 2
-
Komprimierung wird für die Kapazitätsstufe empfohlen
-
Für höhere Redundanz wird eine Paritätsstufe von 3 empfohlen
-
-
-
Navigieren Sie in Ihrem Volume zum Abschnitt „Shares“
-
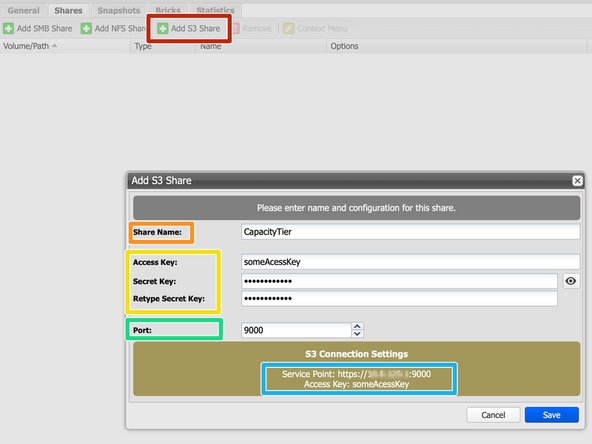
Wählen Sie „S3-Freigabe hinzufügen“
-
Geben Sie einen Freigabenamen ein
-
Geben Sie die Anmeldeinformationen für den Zugriff auf die S3-Schicht ein
-
Der Port wird für jede neue S3-Instanz automatisch erhöht
-
Notieren Sie sich die Zugangspunkt-URL.
-
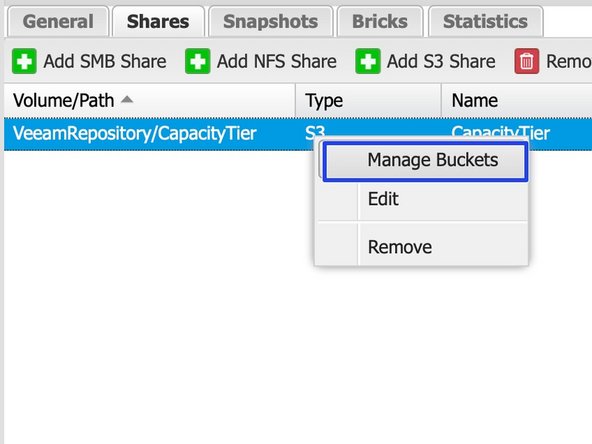
Klicken Sie mit der rechten Maustaste auf die S3-Freigabe und wählen Sie „Buckets verwalten“
-
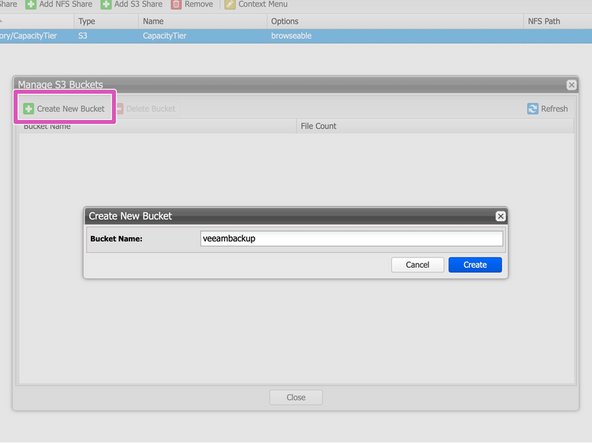
Erstellen Sie einen neuen Bucket für die Verwendung mit Veeam
-
-
-
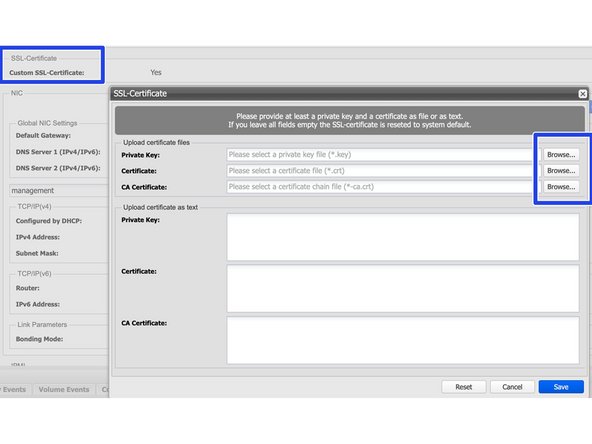
Da S3 über HTTPs kommuniziert, werden Zertifikate verwendet. Um das SSL-Zertifikat des Silent Brick Systems zu aktualisieren, gehen Sie wie folgt vor:
-
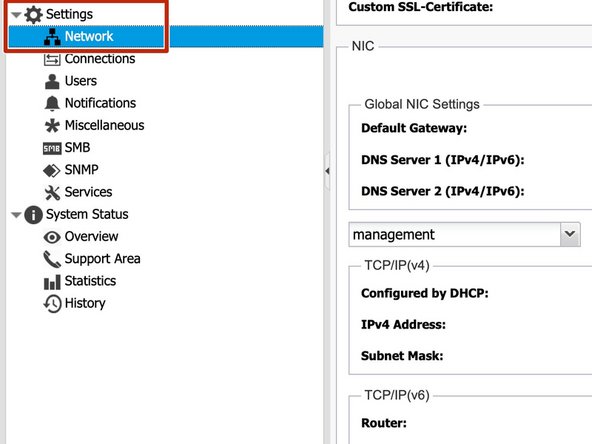
Navigieren Sie zu Einstellungen -> Netzwerk
-
Wählen Sie „Bearbeiten“ bei „Benutzerdefiniertes SSL-Zertifikat“ und laden Sie Ihre eigenen Zertifikate hoch.
-
Zertifikate können manuell oder über Dienste wie Lets Encrypt
-
Unterstützte Zertifikatstypen sind SSL-Zertifikate einschließlich des privaten Schlüssels und der signierenden Zertifizierungsstelle.
-
Zertifikate mit Passphrase werden nicht unterstützt.
-
-
-
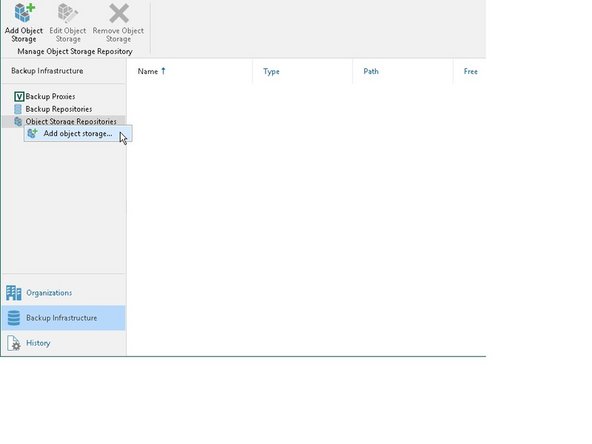
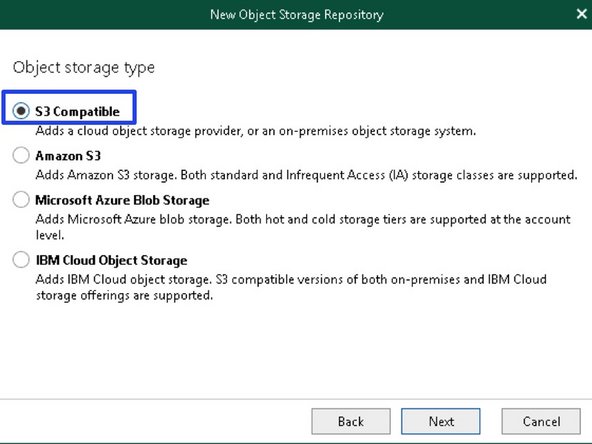
Fügen Sie ein neues Repository vom Typ 'Object Storage' - 'S3 Compatible' hinzu
-
Geben Sie die zuvor notierte Service Point-URL ein
-
Geben Sie die Anmeldeinformationen wie für die S3-Freigabe definiert ein
-
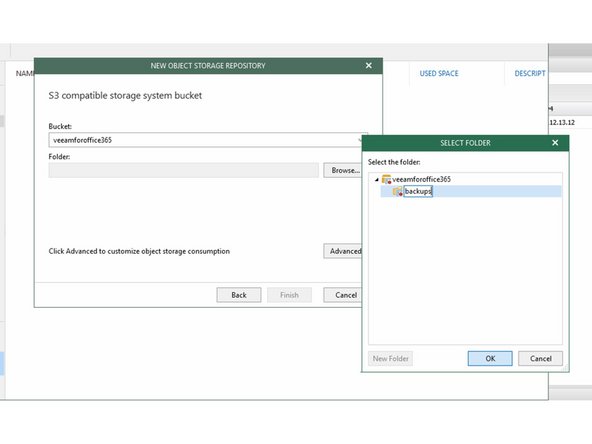
Wählen Sie den zuvor erstellten Bucket
-
Fügen Sie dem Bucket einen Ordner hinzu
-
Veeam for Office 365 benötigt einen lokalen Speicher zum Caching von Daten. Eine ungefähre Größe sollte auf etwa 1% des gesamten Backup-Bedarfs festgelegt werden
-


