
Einleitung
Dieser Leitfaden beschreibt die Einrichtung einer Kombination aus dem Silent Brick-Archiv und Datatrust SAM.
Dieser Leitfaden wurde mit der Softwareversion 2.22 getestet.
-
-
Dies ist nur erforderlich, wenn Ihr Archiv über SMB / CIFS verbunden wird
-
Gehen Sie zu Einstellungen -> SMB
-
Konfigurieren Sie Active Directory oder fügen Sie einen neuen lokalen Benutzer hinzu
-
-
-
Ordnen Sie mindestens ein Brick dem Stage Bricks zu. Brick kann sein
-
Standard Brick
-
FLASH Brick
-
WORM Brick. Wird partitioniert. Größe nach Bedarf. Standard: 1 TB
-
Füge dem Archiv ein oder mehrere Bricks hinzu.
-
-
-
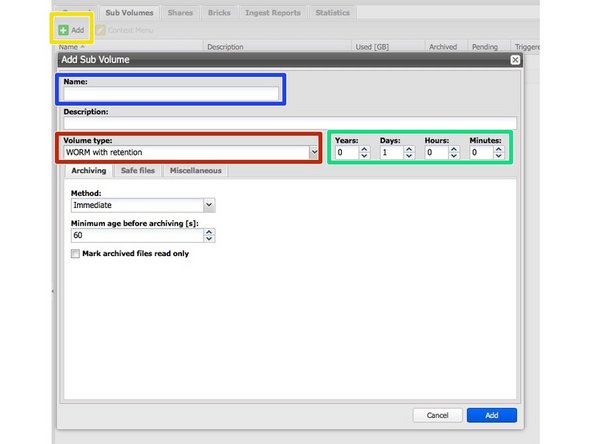
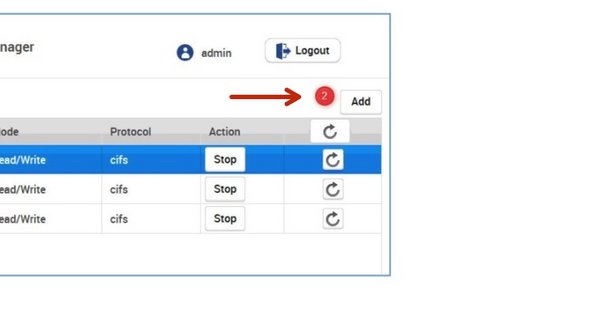
Wählen Sie im Archiv unter dem Reiter „Sub Volumes“ die Option „Hinzufügen“.
-
Volume Name: SAM
-
Volume Typ: Wurm mit Versionierung
-
Aufbewahrung: Nach Wunsch
-
Andere Einstellungen: -
-
-
-
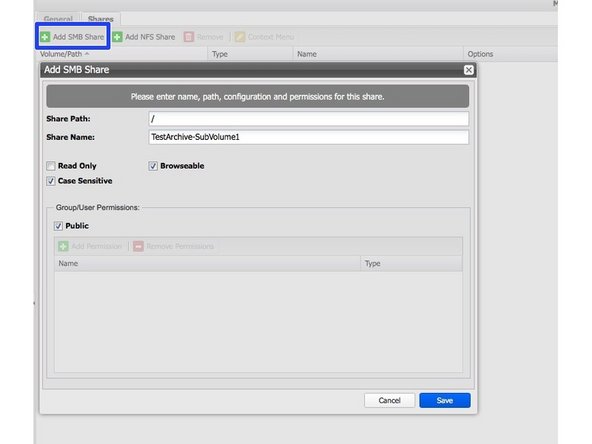
Um eine SMB-Freigabe zu erstellen, klicken Sie auf "SMB-Freigabe hinzufügen".
-
Freigabepfad: /
-
Freigabename: SAMArchive
-
Deaktivieren Sie die öffentliche Einstellung und fügen Sie den in Schritt 1 erstellten Benutzer hinzu
-
-
-
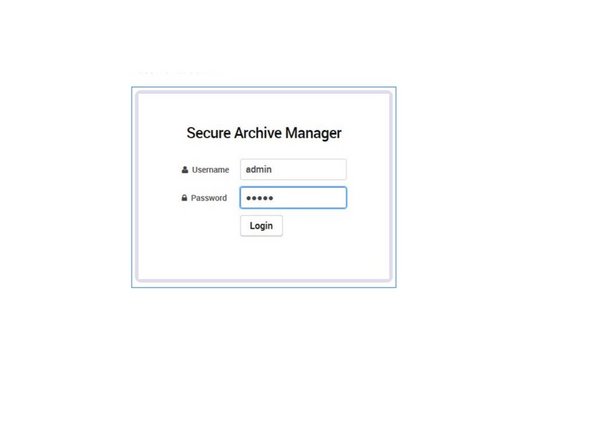
Melden Sie sich bei Ihrer SAM-Konsole an
-
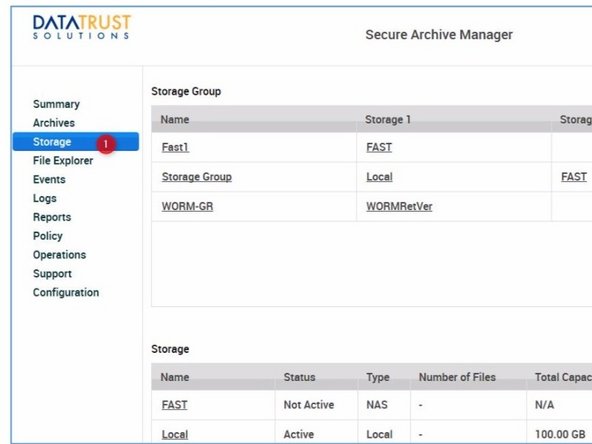
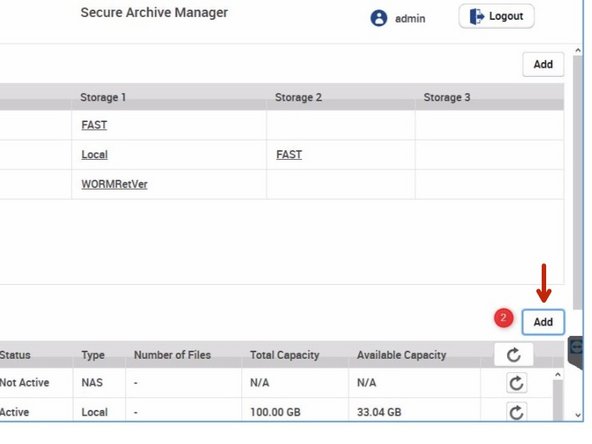
Navigieren Sie zur Registerkarte „Speicher“
-
Klicken Sie im Abschnitt „Speicher“ auf „Hinzufügen“
-
-
-
Wählen Sie „Hinzufügen“ im Speicherbereich
-
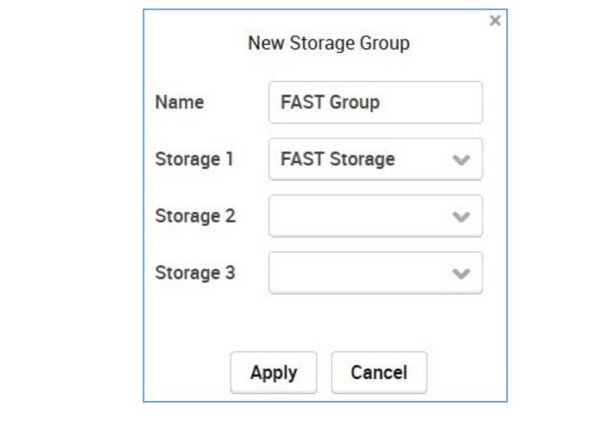
Geben Sie einen Namen für Ihren WORM-Speicher ein
-
Wählen Sie den Typ UNC
-
Geben Sie den UNC-Pfad zur zuvor erstellten Freigabe ein
-
Geben Sie den Benutzernamen und das Passwort ein, die Sie in Schritt 1 erstellt haben.
-
-
-
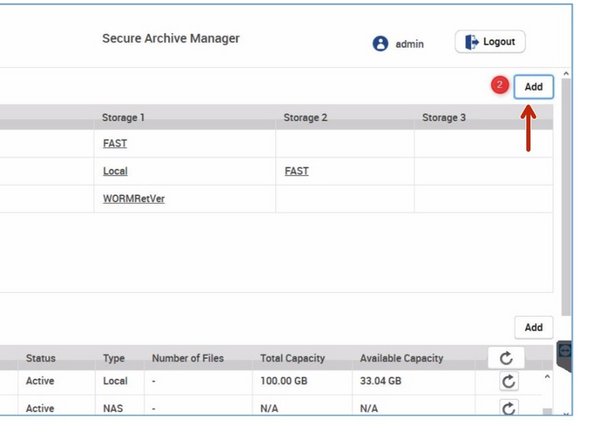
Navigieren Sie in der Registerkarte „Speicher“ zur Schaltfläche „Hinzufügen“ für Speichergruppen.
-
Definieren Sie eine neue Speichergruppe und fügen Sie den zuvor erstellten WORM-Speicher hinzu
-
-
-
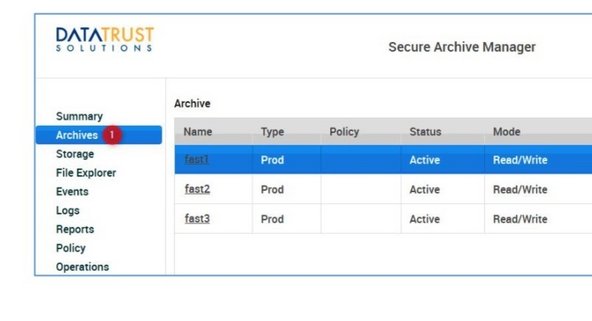
Navigieren Sie zur Registerkarte „Archive“
-
Wählen Sie „Hinzufügen“, um ein neues Archiv hinzuzufügen
-
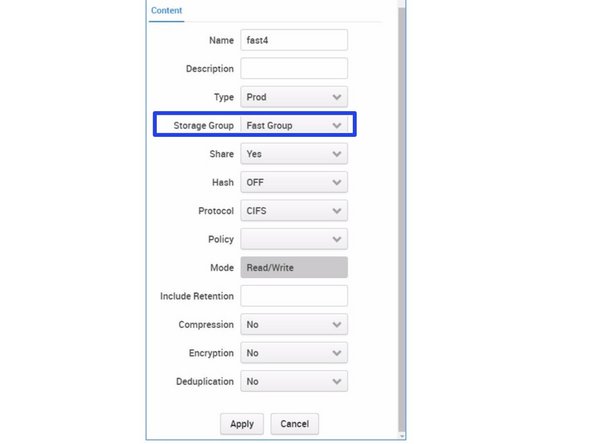
Wählen Sie die zuvor erstellte Speichergruppe als Speichergruppe aus.
-
Nehmen Sie alle Einstellungen wie angezeigt vor
-


Team
