
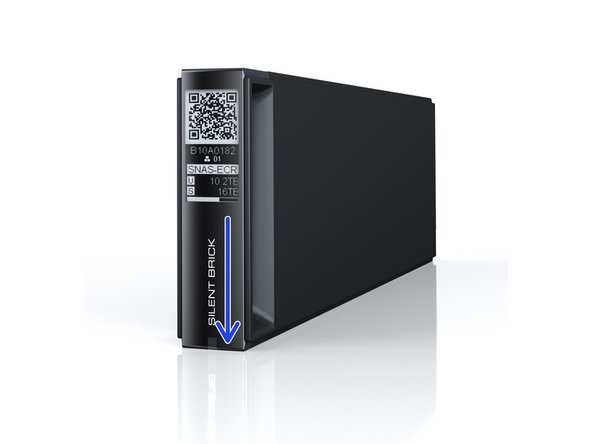
Einleitung
In dieser Anleitung erfahren Sie, wie der entsprechende Silent Brick entriegelt und ausgeworfen wird um anschließend einen Plattenaustausch vor zu nehmen.
Achtung: Diese Anleitung bezieht sich nicht auf den Silent Brick WORM.
-
-
Bei einem SNAS setzen Sie zuerst das entsprechende Volume auf Offline
-
Entriegeln Sie anschließend die Bricks zur Entnahme
-
-
-
Bei einer Virtuellen Tape Library nutzen sie Ihre Backup Software um den entsprechenden Brick mittels 'Export' aus zu werfen.
-
-
-
Der entriegelte Brick kann am gleichmässigen Blinken der LED erkannt werden.
-
-
-
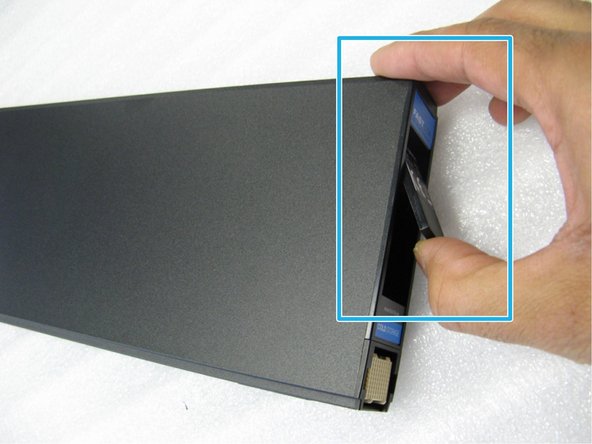
Streichen Sie über den Silent Brick Schriftzug
-
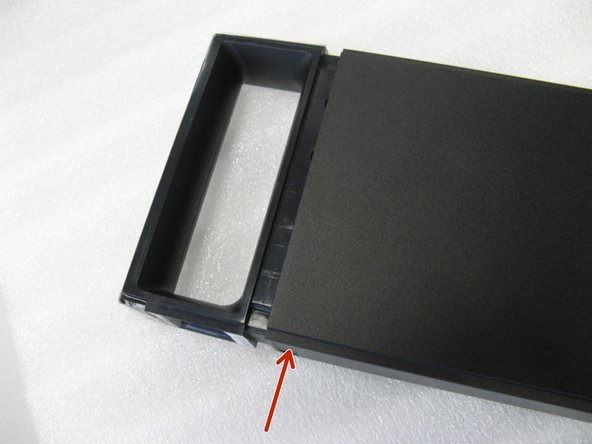
Entriegelte Bricks werden somit ausgeworfen
-
-
-
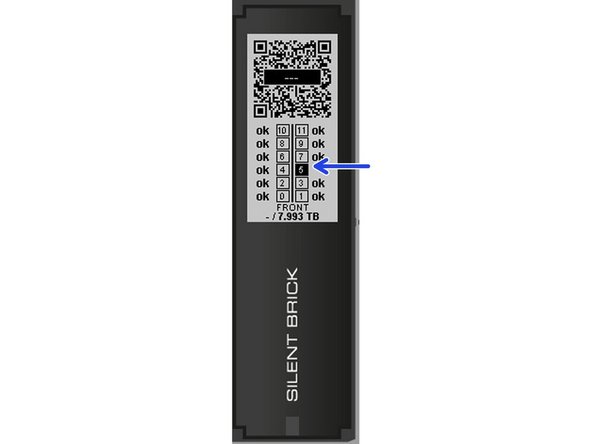
Die Controller Serial zeigt an in welchem Controller sich der defekte Brick findet
-
Der Controller Slot zeigt an in welchem Slot des Controllers der defekte Brick liegt.
-
Die Brick Serial zeigt die Seriennummer des defekten Bricks
-
Die Disk Position zeigt an in welchem Festplattenplatz die defekte Festplatte steckt.
-
-
-
Prüfen Sie das E-Paper Display
-
Die defekte Platte ist Schwarz markiert
-
Notieren Sie sich die Position. ( Hier 5 )
-
-
-
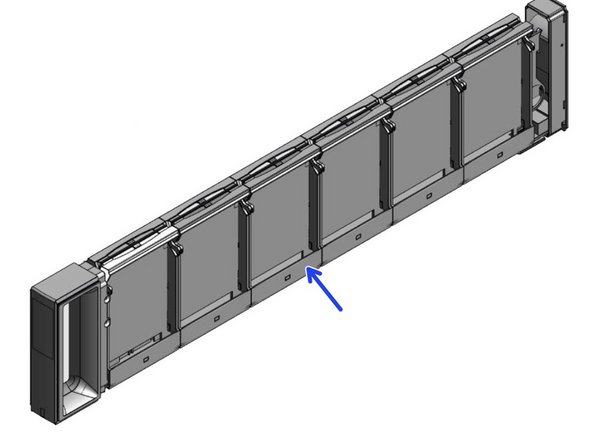
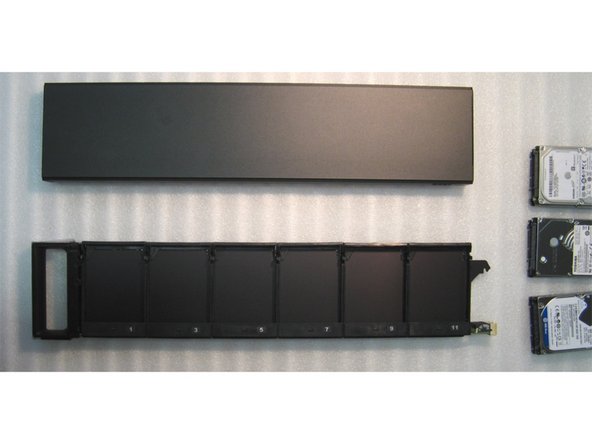
Der geöffnete Silent Brick zeigt die Nummerierung entsprechend des fest gestellten Disk Slots ( hier 5 ).
-
-
-
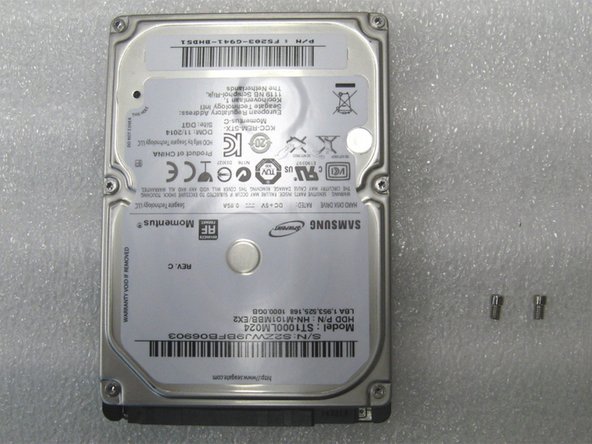
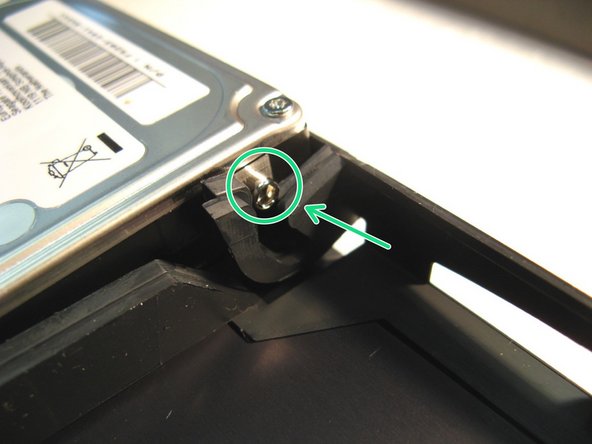
Jeweils zwei Innensechskantschrauben mit Hilfe eines passenden Schraubendrehers seitlich in die Festplatte einschrauben.
-
-
-
Container auspacken und mittels Hebel an der Rückseite öffnen.
-
Abhängig vom Modell die zweite Entriegelung an der Front eindrücken
-
Den Schlitten aus dem Gehäuse ziehen
-
-
-
Drücke die Plastik-Lasche nach oben
-
Die Festplatte schiebt sich aus dem SATA Port und kann entnommen werden
-
-
-
Die mit Schrauben versehenen Festplatten vorsichtig einsetzen. Darauf achten, dass die Schraube in dem Aufnahmeschlitz zum liegen kommt.
-
Die Festplatte mit Hilfe der oberen Plastikabdeckung nach unten drücken bis sie einrastet.
-
-
-
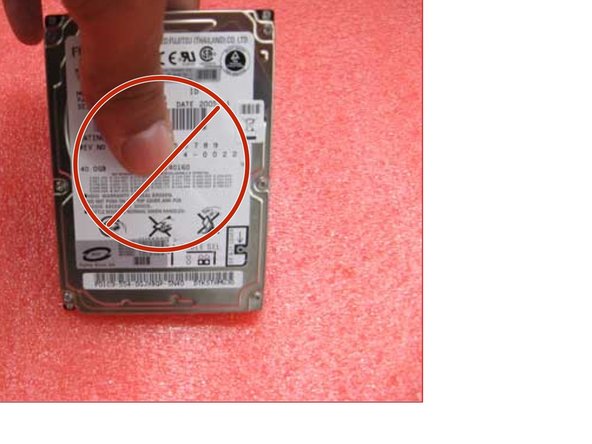
2.5“ Festplatten sollten wenn möglich nur am Rand angefasst.
-
Auf keinen Fall in der Mitte zusammendrücken.
-
-
-
Alle Schritte im kurzem Video zusammengefasst.
-


Rückgängig: Ich habe diese Anleitung nicht absolviert.
Ein weiterer Nutzer hat diese Anleitung absolviert.

Team
